



Jump rope sizing
Jump rope sized just for you
Correct Jump Rope Length
To truly enjoy jumping, you need to adjust your jump rope to the correct length. Step on the rope with one foot and pull it up alongside your body. The length of the cord with beads (without handles) should reach approximately under the chest for beginners and to the waist for more advanced jumpers.
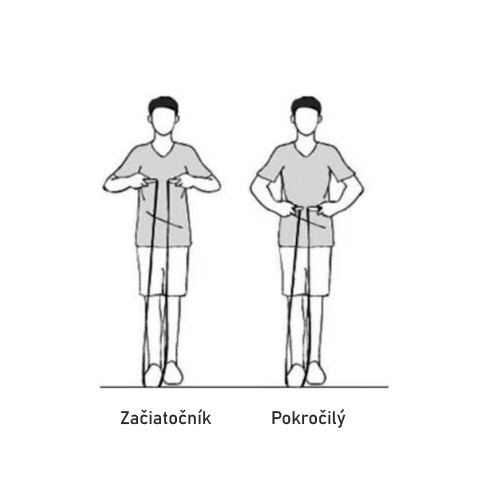
However, everyone has a different jumping style, so it’s likely you’ll need to fine-tune the rope length to suit exactly what you need.
Rope Too Long
How do you know if your rope is too long? When jumping, it hits the ground far in front of you. Ideally, it should hit just in front of your toes, allowing for lower and more efficient jumps. If it hits too far ahead, it already starts rising under your feet, forcing you to jump unnecessarily high. That tires you out faster and hurts your technique too. 😥
Rope Too Short
When is your rope too short? When it doesn't touch the ground at all, or keeps hitting your feet or your head from behind. 🤕
Don't Be Afraid to Adjust Repeatedly
As you keep jumping, your technique will improve – your hands will move closer to your body, the "rope arc" will become narrower, and you’ll need to shorten your rope gradually. Watch for the signs. 🌟
Measure Twice, Cut Once!
While you're still figuring out your ideal length, leave some extra length in case you need to extend it again (by letting the cord stick out or using the double-double knot – instructions below). And if you accidentally cut it too short, don’t toss your rope. 🫣 You can always order a replacement cord. 👌
So How Do You Shorten the Rope?
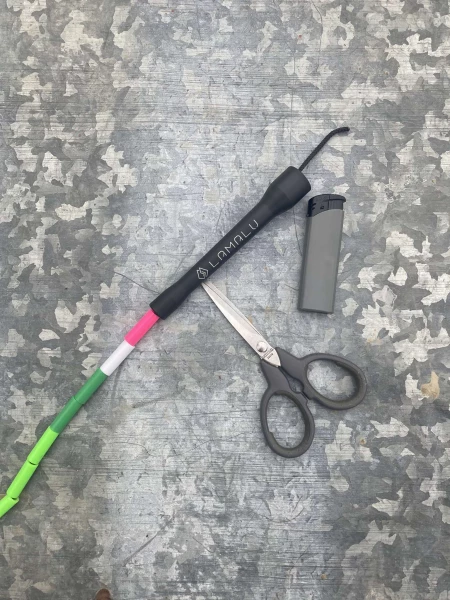
Prepare your jump rope, scissors and a lighter.
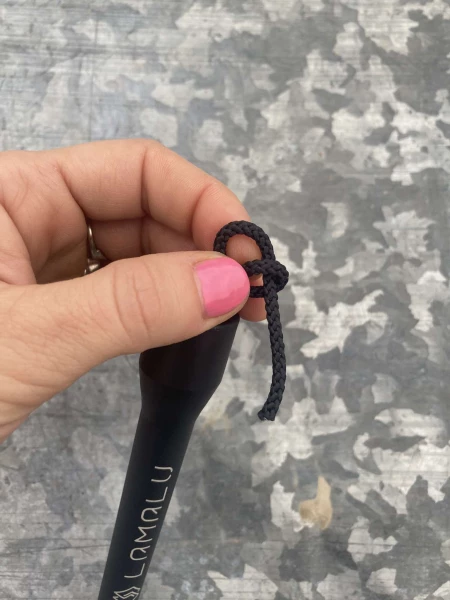
Untie the knot at the end of the cord.
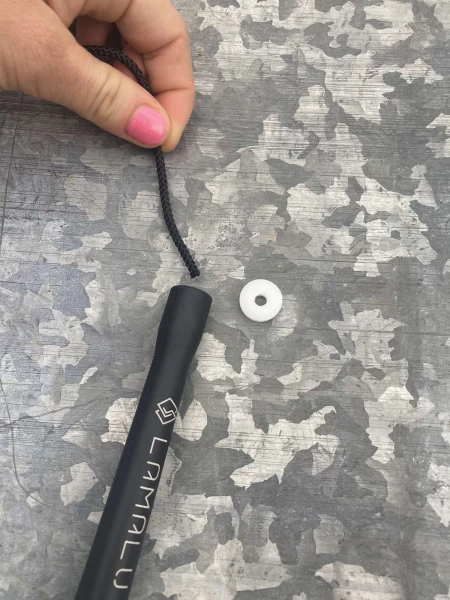
Pull off the handle and the plastic ring.
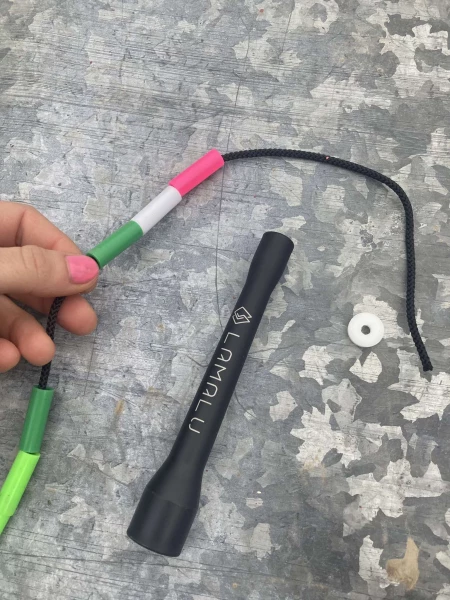
Remove as many beads as needed.
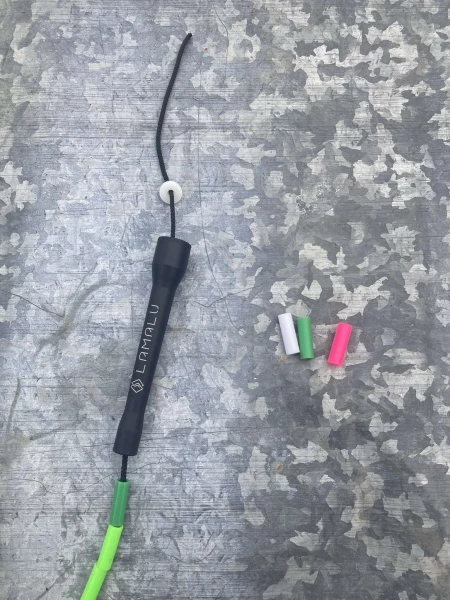
Thread the handle and plastic ring back on.
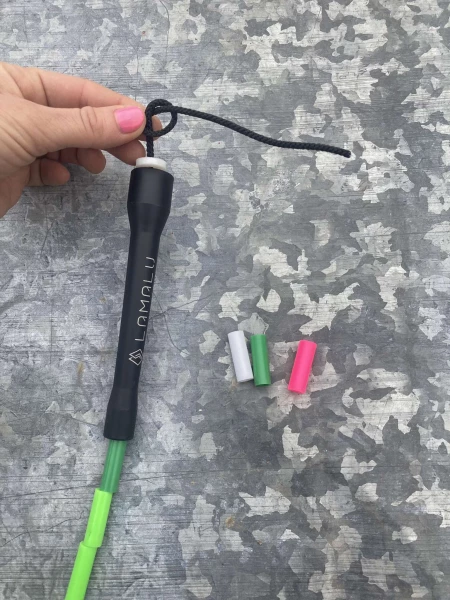
Tie a knot.
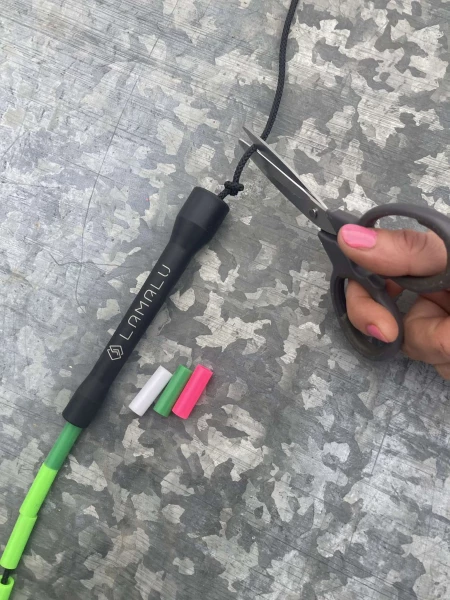
Cut the excess cord.
(Measure twice, cut once – don't cut too much. While you're not sure you won't need to lengthen the rope, leave the cord sticking out, or hide the reserve in the "double-double knot" – instructions below.)
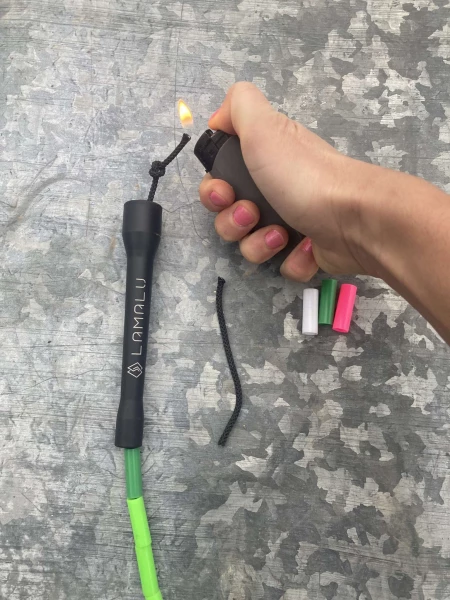
Use a lighter to melt the cut end of the cord so it doesn't fray.
Why and How to Use the “Double-Double Knot”?
This knot hides a good amount of slack for later lengthening if you find out your rope is too short after cutting. Compared to letting the cord stick out (which also provides slack), this knot fits inside the handle and won’t tickle your palm while jumping. The downside is it’s harder to untie.
Personally, I leave the cord sticking out during the adjusting/testing phase, and once I’m sure the length works for me, I tie the double-double knot, cut the extra cord, and melt the ends.
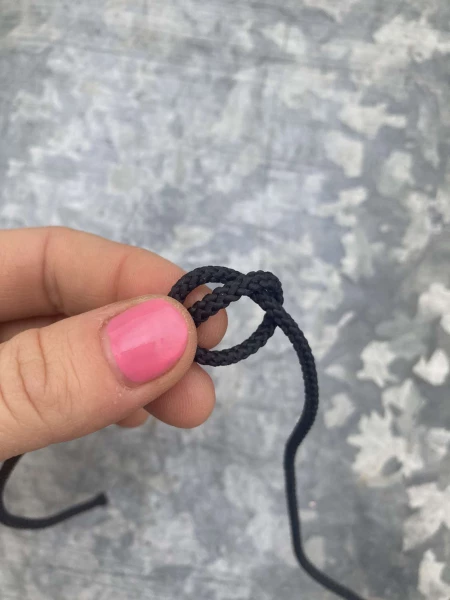
Tie a classic knot, but don't tighten it – leave it loose.
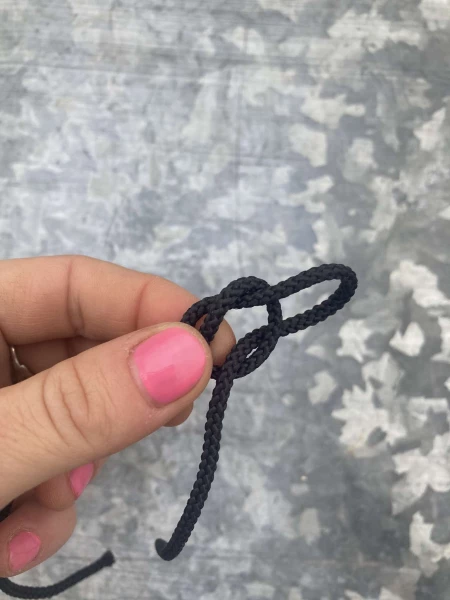
Thread the cord through the loop one more time.
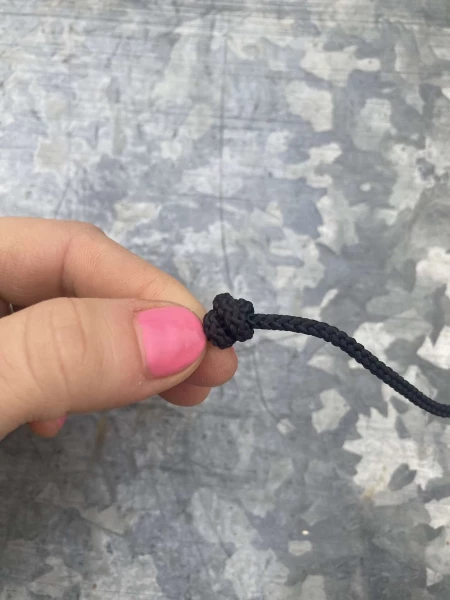
Pull the cord tight – your first double knot is done!
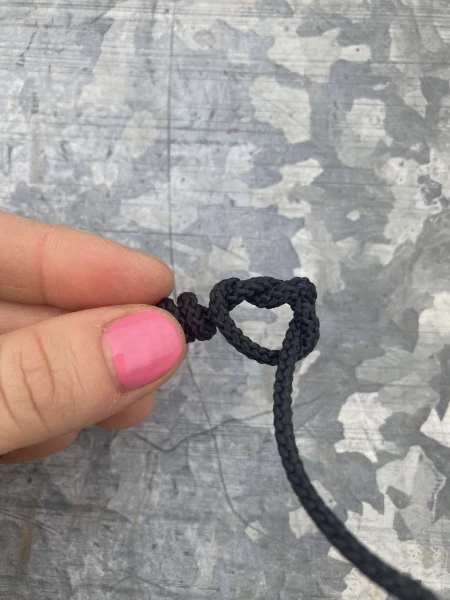
Right after the first, tie a second double knot.
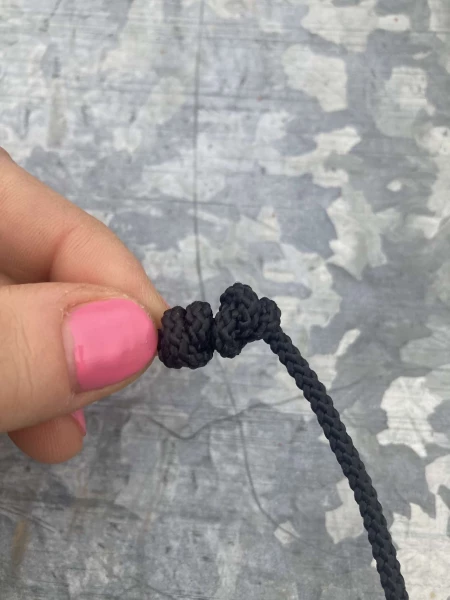
Tighten the second double knot – you now have the "double-double knot".
(It hides inside the handle so it won't bother you while jumping, while keeping a reserve for potential lengthening of the rope.)
Done!
Your rope is ready – let’s jump!